How to Manage State -useState()vs Redux

State management is crucial for handling an application's data, how users interact with it, and how different parts of the app behave.
And it's not something you'll use only in React.js, but also in other popular tools like Angular.js, Vue.js, and Next.js.
There are two common ways to manage a state: useState and Redux. But there are also other options like MobX, Zustand, and Recoil.
In this article, you will learn about state management and why it's important. We'll also explore common state management methods and understand how they work.
After reading this article, you'll be able to pick the best state management method for your app.
Prerequisites
Have an understanding of React.
Make sure you install Node.js on your system.
What is State Management and Why Is It Important?
State management is a crucial part of application development. It lets programmers control how the app responds to different events and user actions.
It helps you create dynamic and interactive interfaces, making the user experience better.
What Sort of Sites/Apps Use State Management?
State management is used in lots of websites and apps, from simple to complex ones.
React and frameworks like Angular.js, Vue.js, and Next.js often use state management to handle data and control how components behave.
What to Consider When Choosing a State Management Strategy
The application's complexity: For simple apps with few components, use
useState(). For complex apps with extensive state interactions, chooseRedux.Team size and skill level:
useState()is okay for smaller teams or developers new to state management because it's easy to understand.Reduxcan be good for larger teams with experienced developers.Sharing State:
Reduxcentralized state management is easier to use in some cases thanuseState().Scalability:
Reduxoffers advanced features that help manage complex states.
State Management Examples:useState() vs Redux
To understand state management better, let's check out a practical example that shows how useState() and Redux work in React.
Setting Up the Project
First, go to the project folder. Create a React boilerplate using the create-react-app command or the Vite tool.
I prefer vite (and this is what the React document currently recommends) because it's faster for development and easier to configure. Vite is also more versatile and supports other front-end frameworks such as Svelte. But if you prefer, create-react-app is still an option.
Next, in the terminal of your editor, type this command:
npx create-react-app ./ or npx create-vite@latest ./
./ creates the React boilerplate for you right inside the created folder or directory.
Option 1: Managing State with useState()
useState() a built-in hook in React. It manages the state of React applications locally.
useState() introduces state management capabilities in functional components. This means you can now use stateful logic within functional components.
In React, you have access to various other hooks that you can import and use in your applications. These hooks make your app more dynamic and efficient.
Check out this article to learn more: Simplify your React programming effortlessly with these 8 amazing hooks.
For more information on the useState() hook, you can check out this tutorial. It will provide you with detailed insights and examples related to useState().
Pros of Using the useState() Hook in a React Application
useState()has a smaller footprint than external state management libraries likeRedux. This reduces the application's bundle size and improves performance.It allows for more clear and intuitive state management within functional components.
Cons of Using the useState() Hook in a React Application
It is cumbersome to manage the state of complex components with many variables.
Due to its limited capabilities, it leads to issues like prop drilling, which can be a bit confusing if not understood.
It triggers a re-render of the component impacting performance.
How to Use useState() in React Applications
So let's create an application that changes the color based on the user's input.
Using useState() involves a simple process:
Import the
useState()hook from the 'react' library.Define a state variable and its initial value using array destructuring.
Then, define another state variable that takes in the color choice of the user when typed.
Use the state variable and its corresponding setter function within the component's logic to read or update the state.
Here's what that looks like in the code:
import React, { useState } from 'react';

const State = () => {
  const [text, setText] = useState('black');
  const [color, setColor] = useState('black'); // Another state to store the chosen color by the user

  const handleInputChange = (e) => {
    setText(e.target.value);
  };

  // A function is been declared
  const handleButtonClick = () => {
    setColor(text); // it updates the chosen color when the button is clicked
  };

  return (
    <div>
      <p style={{ color: color }}>
        Progressively effective resources via business metrics.
      </p>
      <br />
      <div className='inputBtn-container'>
        <input
          type='text'
          className='input'
          value={text}
          onChange={handleInputChange}
        />
        <button className='btn' onClick={handleButtonClick}>
          Change text color
        </button>
      </div>
    </div>
  );
};

export default State;
The code above shows an example of how a useState() can be used to manage a state.
In the above code, the state variable text is set to the initial state (color) using useState(). The setText() is set to update the value of color when the button is clicked.
The second state defined is to store the color update from the user. So the text color remains unchanged until the button is clicked. Once the button is clicked, the color state updates with text value, changing text color to what the user types.
Option 2: Managing State With Redux
Redux is a JavaScript library for managing states in applications. It works with React and other frameworks.
Redux helps you manage the global state of your app. It improves your app's performance as well.
Think of Redux as a traffic controller for the data in the app. It makes sure that the right information goes to the right places, so everything runs smoothly.
Pros of Using Redux in Your Application
Redux might seem complex at first, but it comes with several advantages that make learning it worthwhile:
Reduxcan be used with other front-ends frameworks not only in React applications (for example Angular.js, Vue.js, and Next.js).Reduxallows you to store all the states in a central store, instead of scattering states across many components. This makes it easier to understand, track, and manage the application state.Many large companies use
Reduxto manage the state of their application.
Cons of Using Redux in Your Application
Using
Reduxcan make your app more complicated, especially if you're new to it. You'll need to learn new concepts and write more code, which might take time to understand and use.Reduxneeds more code compared touseState().If your app is small or doesn't have complex state needs, using
Reduxmaybe unnecessary.Debugging can be challenging in a complex Redux setup.
How to Use Redux in Your Application:
First, you'll need to install the Redux package:
The gif above shows that I ran three commands together in the terminal. This is a personal preference.
What are these commands doing:
npm install reduxinstalls theReduxlibrary.react-reduxsignifies thatReduxis being used in a React application. It provides integration.@reduxjs/toolkitsimplifiesRedux, especially for beginners. It offers helpful tools and abstractions that make working with Redux easier and less complex for new developers.
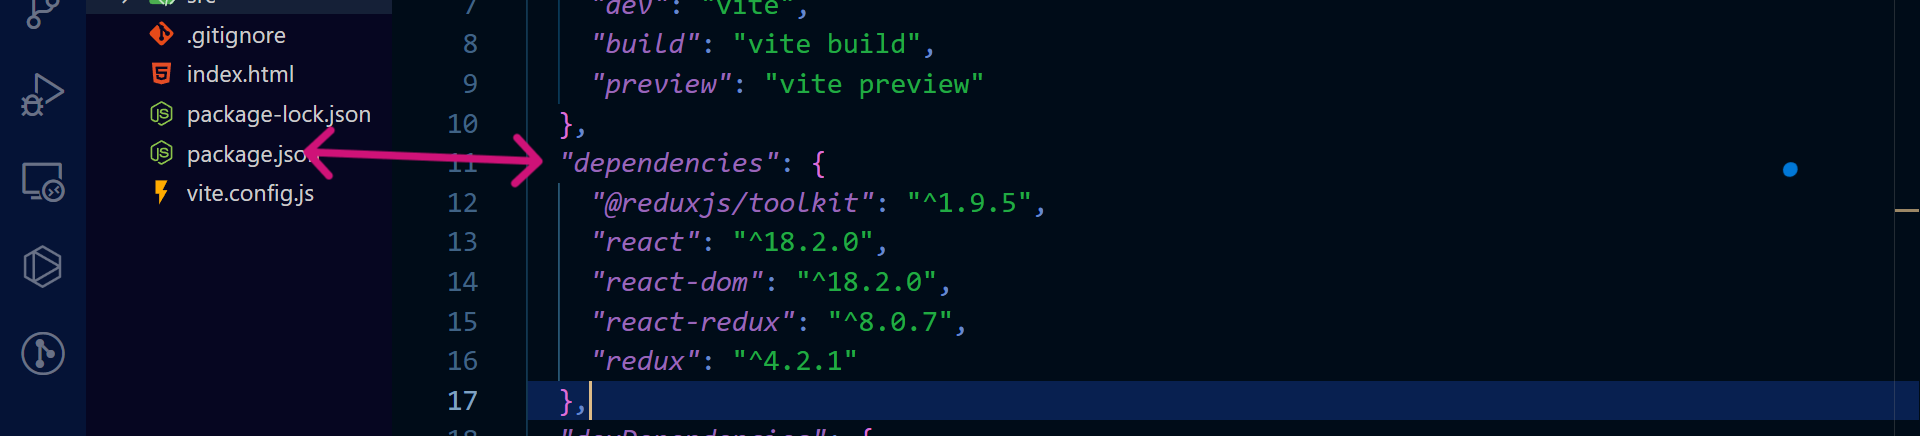
Next, check to make sure that Redux has been added to your dependencies. Look at your package.json file. It contains important information about the packages used in your project.
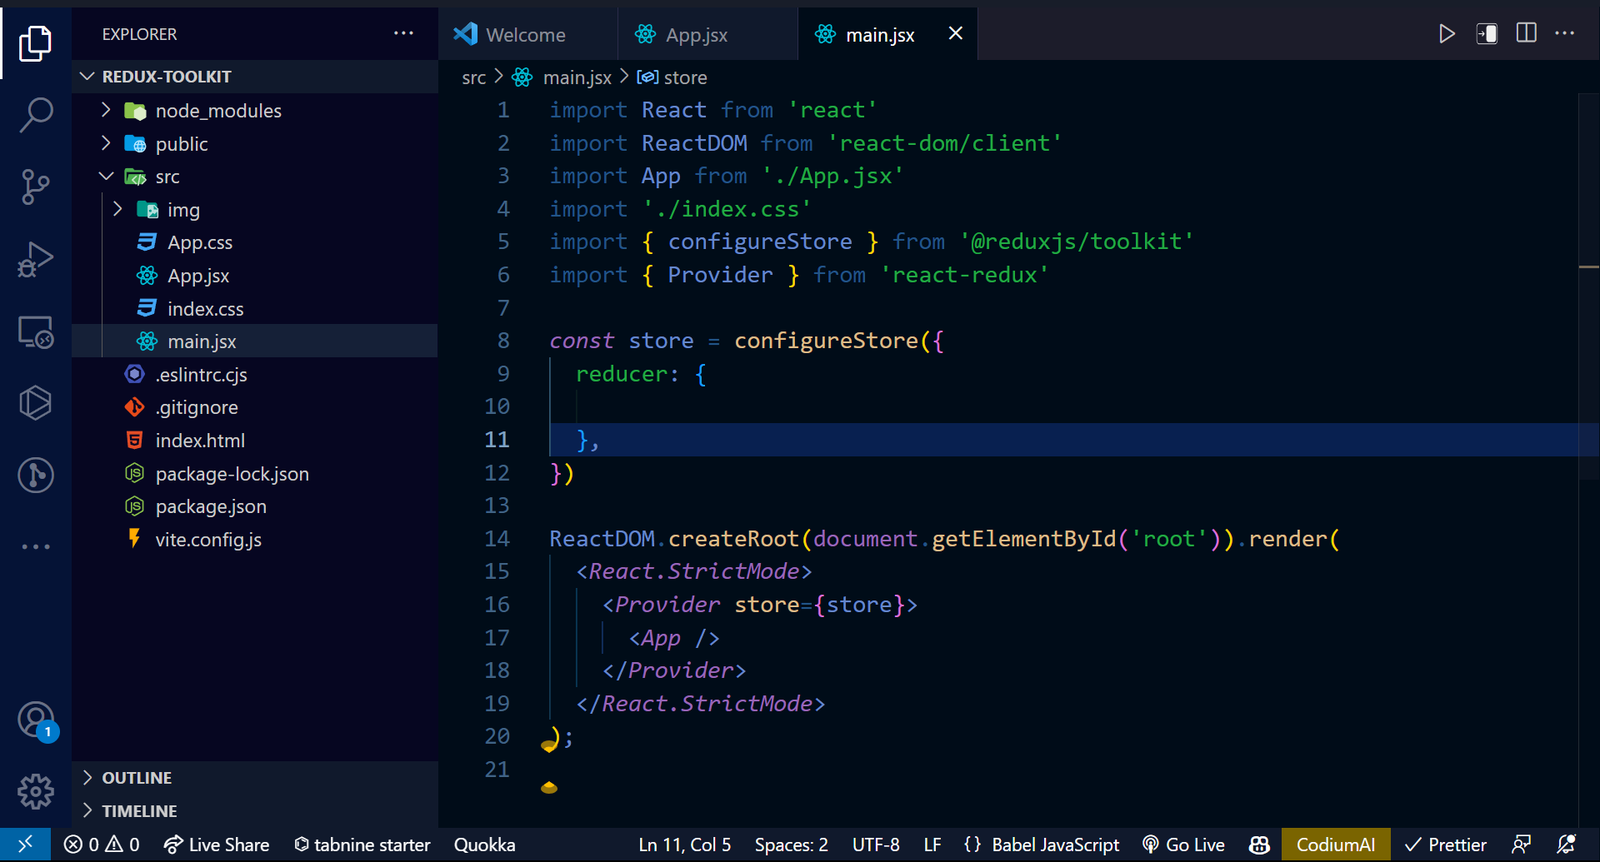
Then import {configureStore} from @reduxjs/toolkit to the main.js or index.js.
Use the provider tag to wrap up the main component of our app. Provide the store as an attribute (props) to the provider. This makes the store accessible globally throughout our application.
Let's go over some key terms used in Redux:
Store: A "container" in our application is like a storage unit. Inside the store, we will define the reducer.
Redux operates based on the principles of a centralized store. It acts as a central store that holds the application's entire state. When any component needs access to the state or needs to be updated, it interacts with the store. The store then manages the data and propagates changes to the relevant parts of the application.
Reducer: A reducer is an object that takes two inputs: the previous state and an action. It returns the updated state based on the dispatched actions. It examines the activity and decides how to update the app's state.
Reducers in Redux control how our app reacts to user input. This flexibility makes it easy to maintain and change our code when needed. We can use the store and Provider imports to update our application.
Redux Example
So let's create an application that changes the colour based on the user's input and use Redux to manage the state this time.
First, make a folder called components. Inside that folder, create a file named ChangeColor.jsx.

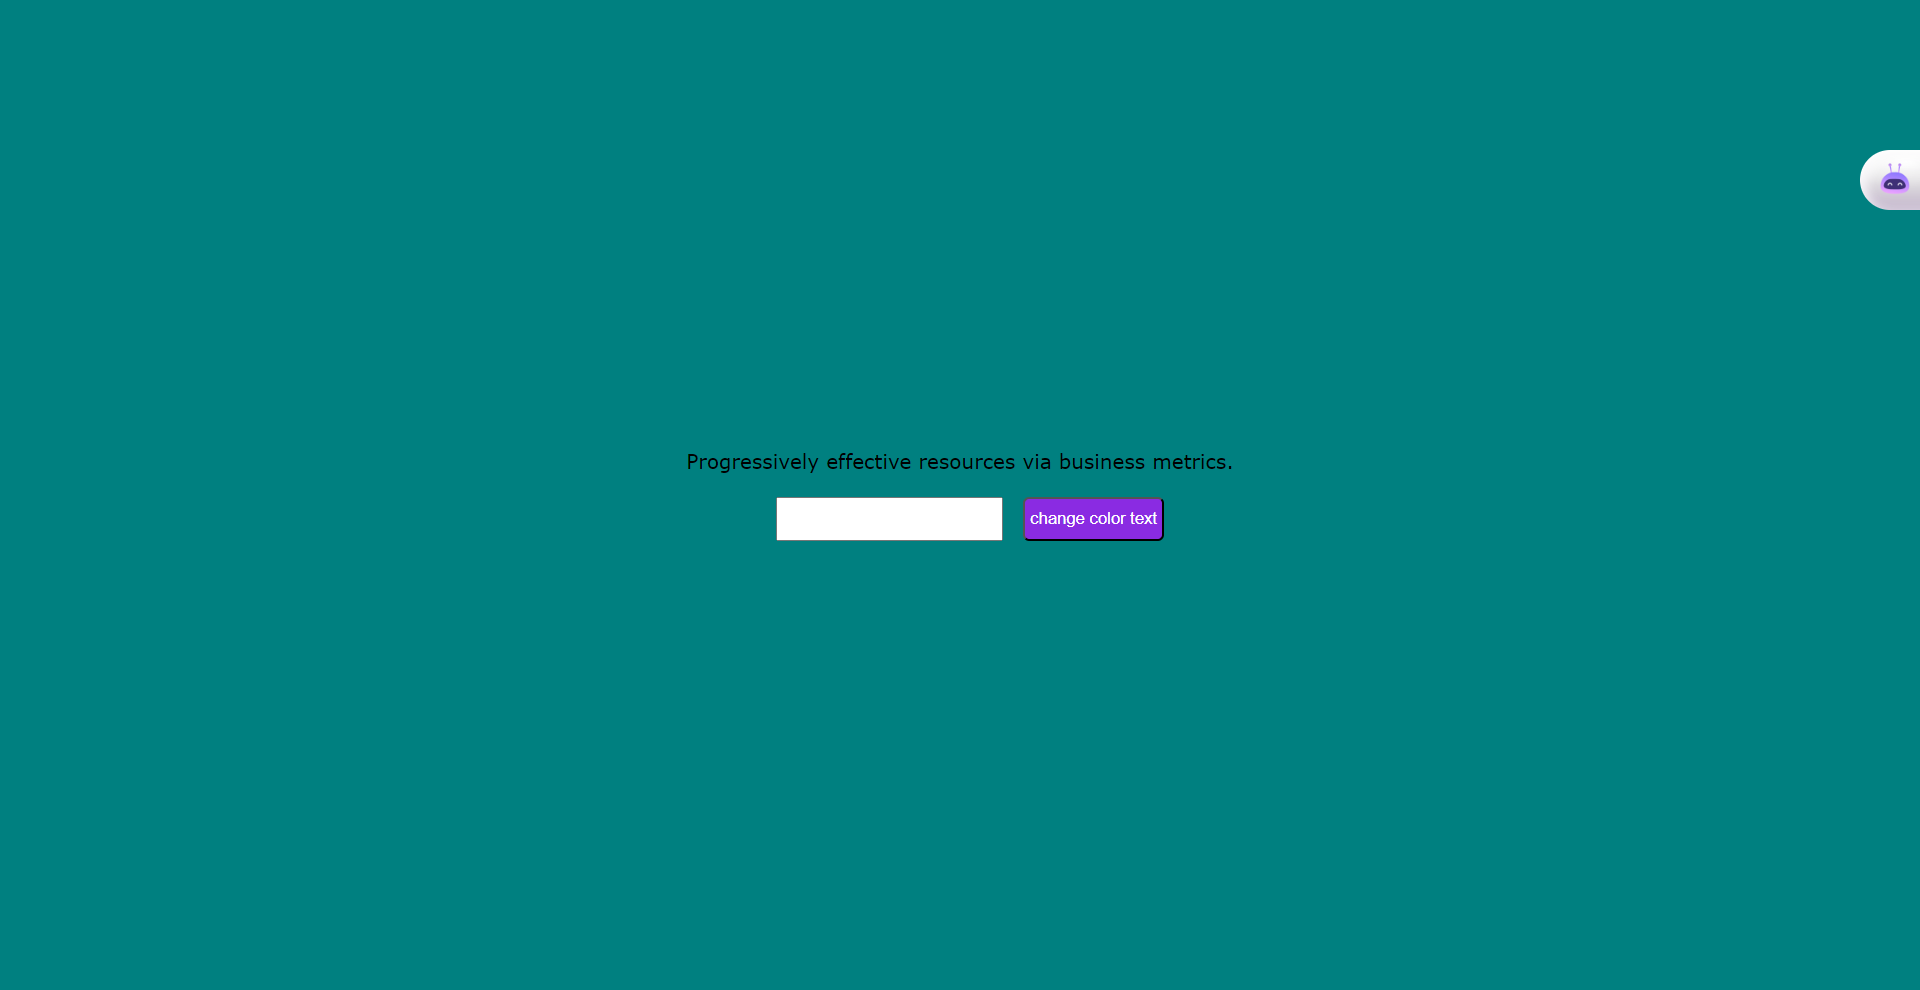
Here's the output:
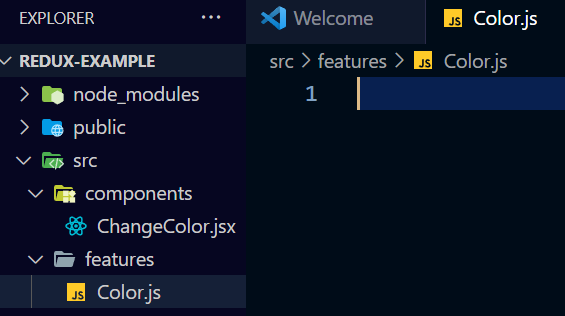
In your project directory, create a folder named features. Inside this folder, create a file called Color.js to hold the Redux logic for your application.
Next, we want to enable users to input their desired color. To do that, import the useState() hook inside the ChangeColor.jsx like this:
ChangeColor.jsx
import { useState } from 'react';   // useState() hook

const ChangeColor = () => {
  const [color, setColor] = useState('');
  return (
    <div>
      <p>Progressively effective resources via business metrics.</p>
      <br />
      <div className='inputBtn-container'>
        <input
          type='text'
          className='input'
        />
        <button className='btn'>change color text</button>
      </div>
    </div>
  );
};

export default ChangeColor;
At the color.js. This file holds the Redux logic for your application.
// Import necessary functions from Redux Toolkit
import { createSlice } from "@reduxjs/toolkit";// Creating a slice for functionality is essential.

// Define the initial state for the slice
const initialState = "black"


// Create a slice using the createSlice function
const themeSlice = createSlice({
  name: 'theme', // Name of the slice
  initialState: { value: initialState},// Initial state for the slice
  reducers: {
    changeColor: (state, action)=>{
      state.value=action.payload // Update the color value based on the dispatched action
    },
    }
  }
})
Let's see what's going on in this code:
createSliceis a function from the Redux Toolkit that lets developers create reducers in a clear and organized way. It simplifies splitting logic and accessing it across the application. With createSlice, changing values and understanding the code become easier.nameis a string that defines the name of the slice. This name is used as a prefix for the generated action type strings.initialStateis the initial state value for the slice.reducersare objects that take two inputs – the previous state and an action. The reducer returns the updated state based on the dispatched actions. It examines the activity and decides how to update the app's state. Reducers in Redux control how our app reacts to user input. This flexibility makes it easy to maintain and change our code when needed. We can use the store and Provider imports to update our application. Using the reducer, we can manage and update the application in a structured way. It helps us track changes according to our desired logic.staterefers to the data stored and managed by the application. It holds the current values of variables, properties, or fields that determine how the application behaves and looks.actionis a plain JavaScript object that describes an intention to change the state. It's how we communicate with the reducers to initiate state updates.
After defining the reducer logic, we can make it reusable by exporting it from the file and importing it wherever we need to manage the state.
For example, in the changeColor.jsx file.
import { createSlice } from "@reduxjs/toolkit";

const initialState="black"
export const themeSlice = createSlice({
  name: 'theme',
  initialState: { value: initialState},
  reducers: {
    changeColor: (state, action)=>{
      state.value=action.payload
    }
  }
})
// Export the reducer function
export const { changeColor } = themeSlice.actions
export default themeSlice.reducer
Let's see what's going on in this code:
We will import the
useSelectorhook fromreact-reduxto get data from the Redux store. This helps us get the current color value from the state.We will import the
useDispatchhook fromreact-reduxto send actions to the Redux store. This allows us to update the color value in the state.And finally import the
Color.jsfile, which contains the Redux logic, including the reducer and the action for changing the color.
Then:
We get the current color from the Redux store using the
useSelectorhook.We render an input element where users can type their desired color.
We define an event handler to handle changes to the input value. When the user types a color in the input, this event handler will be called.
When the user clicks the "Change Color" button, the event handler dispatches an action to the Redux store with the updated color value.
With these changes, the ChangeColor component now uses Redux to manage the state. Users can change the color of the displayed text by typing their desired color in the input field and clicking the "Change text color" button.
import { useState } from 'react';
import { useSelector, useDispatch } from 'react-redux';
import { changeColor } from '../features/Color';

const ChangeColor = () => {
  // State to hold the selected color
  const [color, setColor] = useState('');

  // Accessing the dispatch function from react-redux
  const dispatch = useDispatch();

  // Accessing the theme color value from the Redux store
  const themeColor = useSelector((state) => state.theme.value);

  // Event handler for the input change
  const handleColorChange = (e) => {
    setColor(e.target.value);
  };

  // Event handler for the button click
  const handleButtonClick = () => {
    // Dispatching the changeColor action with the selected color
    dispatch(changeColor(color));
  };

  return (
    <div style={{ color: themeColor }}>
      <p>Progressively effective resources via business metrics.</p>
      <br />
      <div className='inputBtn-container'>
        <input type='text' className='input' onChange={handleColorChange} />
        <button className='btn' onClick={handleButtonClick}>
          Change text color
        </button>
      </div>
    </div>
  );
};

export default ChangeColor;
Here's the output:
Conclusion
The article covers two state management solutions: the useState() hook for small to medium apps and Redux for larger ones.
When choosing which to use, consider factors like app complexity, team size, and performance needs. Understanding both approaches will help you make the right choice.
You can read the Redux documentation to learn more.
If you found this article helpful, share it with others who may also find it interesting.
You can also stay updated on my latest projects by following me on Twitter and LinkedIn.


